 It will be very the choices cook dinner healthy and balanced recipes for Asian Sweet & Peppery Jerky lacking dedicating too much of time and energy. You simply need some practice. Along with following demos you could combine substances, develop specific flavours towards tantalize a person’s quality buds.
It’s surprising to see how most people just don’t know that there is a better procedure for fat loss as opposed to old-school bland and boring bodybuilding diet way. A large a lot of extra healthy meal options in existence besides boring chicken, broccoli, and brown rice. This old-fashioned bodybuilding fat loss diet approach is just not necessary or practical. Plus, if you eat precisely the same foods on a daily basis, you may create nutrient deficiencies because you do not find the nutrients that you would normally get with a more balanced diet.
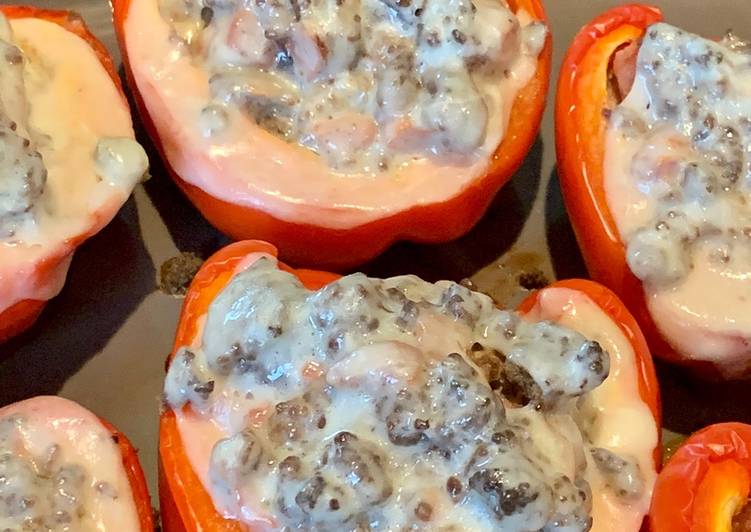
Ingredients of Asian Sweet & Peppery Jerky
While in the preparing approach a person need some essential seasonings. In the event that presently there is something that’s lost and then the actual result are not prior to your expectations. To commence, you are able to make a few of the spices below.
- You need of Basting Sauce.
- It’s 1/3 cup of pineapple juice, unsweetened.
- You must have 3 tbsp of oyster flavor sauce.
- You need 2 tbsp of soy sauce.
- It’s 2 tbsp of rice wine vinegar.
- You need 1 tbsp of white sugar.
- It’s of Jerky Ingredients.
- It’s 2 lb of ground beef, super lean (97%).
- Prepare 2 tsp of Morton Tender Quick Meat Cure.
- Prepare 3/4 tsp of garlic powder.
- Prepare 1/2 tsp of red pepper flakes.
- You need 1/2 tsp of coarse ground black pepper.
- Prepare 3 tbsp of brown sugar.
- You need 1 tsp of Chinese 5-spice powder.
- It’s 1 tsp of onion powder.
- Prepare 1 tbsp of soy sauce.
Step by step for Asian Sweet & Peppery Jerky
To acquire excellent benefits, make sure you keep to the preparing food instructions having the following Asian Sweet & Peppery Jerky the right way
- In a small bowl or measuring cup, mix together all of the basting sauce ingredients and set aside..
- In a large mixing bowl, combine all the jerky ingredients..
- Using your clean hands, mix the jerky ingredients together VERY well. Get in there and really squish it up! I find it's best to rinse your hands under very warm water about every minute while mixing the meat, shaking off excess water (rather than towel drying). Not only warms up your hands, but adds a bit of moisture to the mix, which makes it come out of the jerky gun more smoothly. You want to hand mix for about 8 to 10 minutes to get the flavors well distributed..
- Load your jerky gun with the meat mixture. I like to use a large rubber spatula to push the meat down as I load..
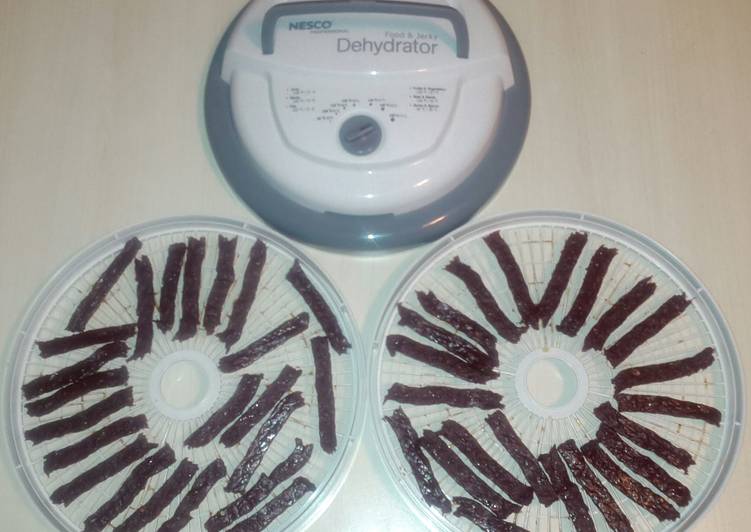
- Squeeze out strips of jerky mix onto your dehydrator trays until all the mix is used up..
- There's always going to be a bit of meat mixture left in the nozzle tip of the jerky gun. No worries! No waste! Unscrew the jerky gun and pull it out..
- Pinch off small pieces of the leftover meat mixture (see photo) and flatten it to the same thickness as your jerky strips. Fill in the small empty spaces on the dehydrator trays. These little pieces are what you'll be taste-testing during the drying process since dehydrating times can vary..
- Gently brush the top side of the meat with the basting sauce..
- Dehydrate at 160°F for 75 minutes..
- Wash your hands very well. Gently turn over all the jerky. Brush on more basting sauce. Rotate your trays and continue dehydrating..
- Continue dehydrating another 3 to 4 hours. The time is variable depending on your dehydrator and moisture conditions. Every hour, remove one of the small test pieces of jerky from the dehydrator. Allow it to cool completely (about 30 minutes) so the basting sauce can become less sticky and eat it. When you're happy with the dryness and texture, your jerky is done. Mine is generally done, to my liking, in a total of about 6 hours of dehydrating..
- Turn off the dehydrator and unstack the trays leaving the jerky on the trays until completely cooled, at least 30 minutes. It must be completely cooled before packaging! I usually wait 1 to 2 hours before packaging. If you prefer a strong pepper kick to your jerky (this is mild), as soon as you unstack the trays, while the basting sauce coating is still a bit sticky, sprinkle with coarse ground black pepper..
- When completely cool, package in airtight containers. I like to vacuum seal about 6 pieces to a bag with my FoodSaver. But you can use ziplock bags or any food container with a tight-fitting lid. This batch here is being shipped to an out-of-state granddaughter, so vacuum packaging is the ideal method..
- ADDITIONAL INFORMATION: If you're lucky enough to know a hunter, deer and elk meat make excellent jerky and, ground, can be substituted for the ground beef in this recipe. The Morton Tender Quick Meat Cure is available in many supermarkets in the spice section near the salt. It's also available at Amazon, though more expensive. The meat cure retards spoilage, although this jerky tends to get eaten up pretty quickly. Should you choose to not add the meat cure, add 2 teaspoons of salt to the recipe..
- Here's another tasty ground beef jerky you might want to try: https://cookpad.com/us/recipes/343813-snapn-peppery-beef-jerky.
Knowing what and how to cook to impress your in-laws isn’t always easy. The good news is that, as family or future family, they will (hopefully!) be prepared to like you anyway, and they will recognize that you are making an effort and be appreciative of that fact in itself. None the less, it is nice to be able to whip up food that impresses, without too much stress or work.
These days, most married couples start out both having careers. Gone are the days when the young wife has all day to prepare a fancy meal for a special family dinner. So it is particularly important to be cooking something that doesn’t take too long in total cooking time, and also that doesn’t require too many last-minute steps.
One technique that you can employ is to upscale a dish that you can already cook quickly and easily and that turns out well. For example, if you make great spaghetti, meatballs, and pasta sauce, you could aim for a more sophisticated version of the same dish, such as spaghetti, chorizo and pasta sauce topped with sprinkled feta cheese and fresh parsley. There are many variations possible on that one dish, so think how many more you can make on all the other things you already cook!
Another idea is to make something that is considered a fancy dish but in reality is quite foolproof, such as oven-roasted pork tenderloin (although be aware this takes a long time to cook).
Another cooking approach is the make-ahead tactic. If you make a great lasagna or chicken pot pie, these are all things that can be assembled or mostly assembled the night before, leaving you with less stress and more time on the day itself. The make-ahead tactic is also one of the best ways of getting multiple side items on the table in a timely manner.
It is important to take into account the cook time compared with the hands-on time of the dish. For example, roast beef doesn’t take much hands-on time but does take a lot of cooking time, whereas a pasta and chicken dish is the exact opposite. Depending on the other things that are going on that day, you may have a preference for one situation over the other. In designing a menu, remember also to check whether your in-laws have any food allergies or foods they will just not eat.
At all costs avoid meals where most of the cooking is to be at the last minute, such as stir-frying. Anything of that nature will mean that you may become flustered when combining a lot of cooking details with trying to make conversation with your in-laws.
Ultimately, remember that your in-laws are there to spend time with you and your spouse – not to get a five-star meal (there are restaurants for that!) Look at it from the point of view that a few days afterward, people want to remember that they had a good time being together, which actually has a lot more to do with the conversation than the food. In other words, don’t agonize over making the perfect side dish if it means you don’t get to spend as much time with your guests. Making an effort and spending time together, not cooking to perfection, is what counts in cooking to impress your in-laws.
Source : Cookpad