 Or perhaps tried Chicago-style "Cheesy Beef" in your residence? Otherwise you are on the appropriate page to quit. You just needs 11 simple steps to cook.
The top 111 will come your way and afford, coupled with basic cooking methods just might help you create recipes from what the heck is seasonal and available, and may keep providing you with back up in close by farmers niche for fresh produce.
Ingredients of Chicago-style "Cheesy Beef"
Within the cooking course of action people need some crucial seasonings. In case generally there is a thing that’s ignored and then the result are not as per your current expectations. To start out, you are able to make a lot of the seasonings below.
- You need 1 of Boneless beef chuck eye roast (about 3 1/2 pounds).
- Prepare 2 tbsp of Extra Virgin olive oil.
- It’s 1 medium of Onion, roughly chopped.
- You need 6 clove of Garlic, roughly chopped.
- You need 1 tsp of Crushed red pepper.
- You require 1 tbsp of Italian seasoning, dried.
- You must have 1/2 cup of Dry Red Wine.
- Prepare 4 cup of Beef stock.
- You need 2 tbsp of Thyme, dried.
- You require 3 of Green Bell Peppers, sliced vertical.
- You require 2 of Italian bread loaves, sliced widthwise.
- Prepare 8 oz of Block Mozzarella cheese, shredded ( Or you can use Cheddar or Provolone).
- You need 1 tbsp of Mild or Hot Giardiniera, per sandwich (Mezzetta Chicago-style Italian Sandwich Mix) **Look at photos.
- You require of The Rub.
- You require 1 tbsp of Ground black pepper.
- You must have 2 tsp of Garlic powder.
- You must have 1 tsp of Onion powder.
- Prepare 1 tsp of Oregano, dried.
- You need 1 tsp of Basil, dried.
Guidelines for Chicago-style "Cheesy Beef"
To have great final results, please stick to the preparing food directions with the following Chicago-style "Cheesy Beef" appropriately
- Position a rack in the middle and preheat the oven to 300° | or you can use a 6qt. Slow cooker on high for 5 hours or on Low for 10 hours.
- Mix the Rub in a bowl | Coat the meat lightly with Extra virgin olive oil to help the rub stick, sprinkle it generously on the meat, and massage it in. There will be some left over. Do not discard it, dump the rest in the juice.
- Heat the Extra virgin olive oil in a Dutch oven over medium-high heat. Brown the roast on all sides until golden and caramelized | Reduce the heat if the fat begins to smoke.
- Transfer the roast to a plate and reduce the heat to medium. Add in the onions and sauté | Next Add the Italian seasoning, crushed red pepper and garlic.
- Deglaze with the Red wine and cook until reduced by half | Add in Beef stock & Thyme and bring to a simmer.
- Place the roast back into the pot and place in the oven or crock pot with juice | Cook the roast, turning every 30 minutes, until very tender, 3 – 4 hours | Add Green Bell Peppers the last 20 minutes or Add to crock pot 2 hours on high with roast before serving.
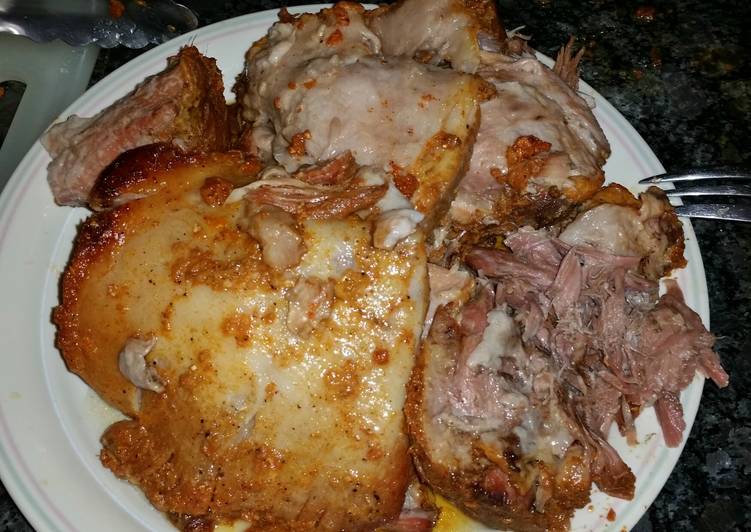
- Transfer the roast to a cutting board and tent with foil. Strain the juice through a fine mesh strainer into a bowl and return back to the pot. Bring to a simmer | Adjust the seasoning if necessary.
- Once cooled a bit, pull the meat until it shreds, return to pot until ready to build the sandwiches.
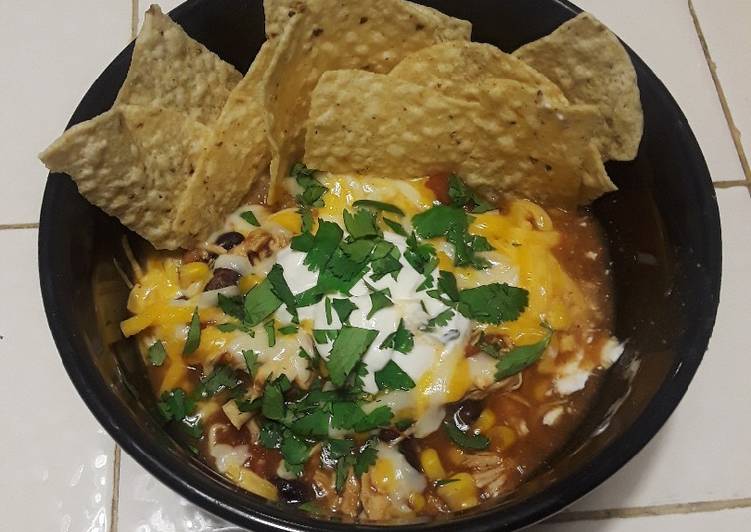
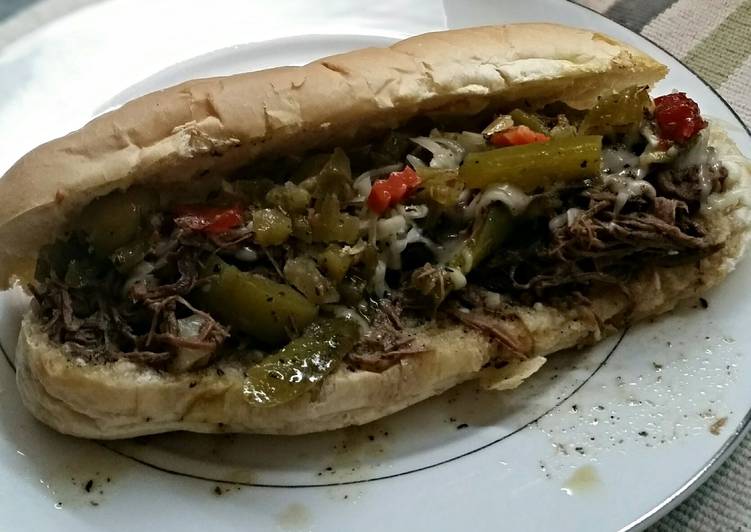
- To assemble the sandwich | Start by Drizzling your sandwich bread with Extra virgin olive oil & Mozzarella cheese on top in the oven for a few minutes at 350° | Spoon some juice directly onto the bun. Get it wet or keep it Dry | Lay on the beef generously with green peppers, sprinkle on more cheese | Finally some Chicago-style Mild Giardiniera | Pour some juice in a small bowl so you can dunk it or pour it over your sandwich!.
- Bon Appétit :).
- Chicago Italian Beef Sandwiches typically say to soak the cooked meat for a day in the au jus (juice) before serving, so I cooked mine the day before, it's so tender it shreds perfectly. Soaked it overnight in the fridge before heating up and serving the next day. The longer it hangs out in the fridge, the better it gets…. Soaking process really brings moisture & flavor into the dry meat..
If you are looking at a very good buttermilk pancake recipe, the very first starting point is with all your ingredients whilst your equipment. Be sure to use a pan that heats evenly and burners that burn neat and fast. This helps increase the risk for consistency and color of the pancakes ideal.
Have a metallic spatula devoid of holes in it. This may cause for the prettier pancake when you turn it before it’s entirely ready. Batter will likely not drip from the holes and increase the risk for pan difficult to utilize and the buttermilk pancakes ugly looking. Presentation is a big part of your good pancake. Add a smaller cup of whipped butter near the plate, or decorate the meal with strawberries, whipped cream, chocolate syrup, and other garnishes.
Buying organic ingredients is a great options, since pancakes are unfamiliar if you are one of the world’s healthier foods. At the least this way you can take a delicious breakfast lower the unhealthy properties of a great number of heavy carbohydrates. In the interests of your taste, organic ingredients will also be good. Do not ruin it by wearing fake maple syrup!
Many people find that pancakes yourself are far better than any pre-mixed ingredients, organic or not. Buy ingredients separately. It is merely slightly costlier and takes a few minutes longer to mix, although the quality might be worth it.
This is the number of ingredients: you begin with one cup of buttermilk. Regular milk can be utilized, they only is definately not as delicious. You need one egg, a half teaspoon of baking soda, a single serving of standard flour, a half tea spoon of salt, one teaspoon of baking powder, one tablespoon of sugar, the other tablespoon of cooking oil.
Crack the egg and beat it, fully ending the yolk. Add the milk and baking soda and stir these well together. You can add the other ingredients, stirring because you go. Mix it and go out the many lumps without making the batter too stiff from too much mixing.
Pour it using a hot griddle that has been prepped with butter or non-stick spray. Makes it on medium heat, especially when you find yourself starting out. The low the warmth, the higher, until you get accustomed to how a pancakes will cook that day. Turn at the appropriate interval and check to make sure it is cooked up through.