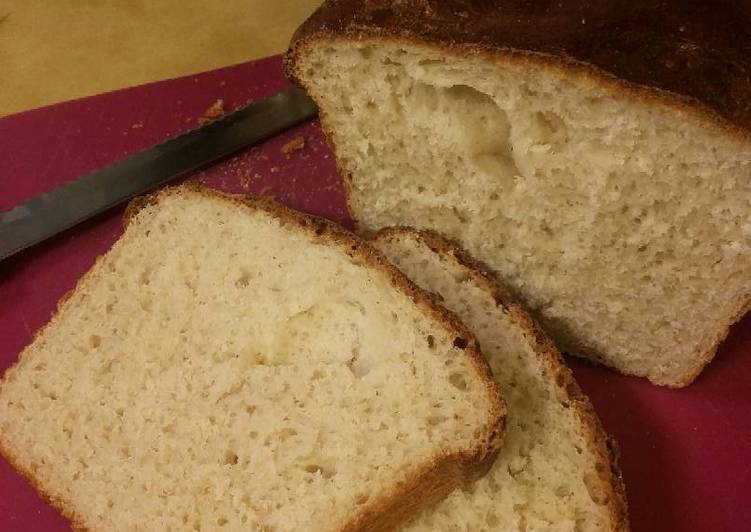
 It happens to be very the choices make meals good meals designed for Nana's Old-fashioned White Bread without having dedicating too much of a serious amounts of energy. And obtain slightly practice. And additionally immediately after trial offers you are able to mix and match constituents, establish special flavours so that you can tantalize ones quality buds.
It’s surprising to learn how many people just do not know that there is a better method of fat loss versus the old-school bland and boring bodybuilding diet way. You can find a large amount of healthy meal options out there besides boring chicken, broccoli, and brown rice. This old style bodybuilding fat loss diet approach is not really necessary or practical. Plus, when you eat precisely the same foods each day, you may create nutrient deficiencies because you will not get the nutrients that you might normally get by using a more balanced diet.
Ingredients of Nana's Old-fashioned White Bread
From the cooking food method a person require some significant seasonings. If perhaps right now there can be something which is ignored and then the result won’t be relative to the expectations. To start with, you can prepare yourself some of the seasonings below.
- You require 2 (1/4 oz) of packets active dry yeast (or 4 1/2 tsp jarred yeast).
- You need 1 cup of warm water (about 100°F).
- Prepare 2 cups of milk – scalded then cooled to luke warm.
- It’s 3 tbs of sugar – divided.
- You need 3 tbs of unsalted butter or shortening.
- You require 1 tbs of salt.
- Prepare 7-9 cups of all-purpose flour.
- You require of Optional-.
- Prepare 1 of egg beaten or 4 tbs melted butter.
Guidelines of Nana's Old-fashioned White Bread
To get fantastic effects, you should adhere to the food preparation recommendations having the subsequent Nana's Old-fashioned White Bread properly
- In the bowl of a stand mixer equipped with a dough hook add water, yeast, and 1 tbs sugar. Stir gently, then allow to bloom untouched 5 minutes. Add scalded warm milk, remaining sugar, shortening, salt, and first 2 cups of flour..
- Turn mixer on to lowest setting until ingredients are just combined. Increase to next speed. Begin adding additional flour 1/2 cup at a time until dough begins to pull away from bowl (mine took about 8 cups today, a rainy Winter day)..
- As soon as dough pulls away stop adding flour and continue running mixer for 2 minutes more. If dough begins to climb hook shut off and scrape down slightly. Then start up again..
- Transfer dough to a greased bowl. Turn once to coat. Cover with a lint free towel and allow to rise 1 hr in a warm spot (I turn my oven on to warm then sit the bowl on the back burner of the stovetop)..
- When dough has risen punch down. Lightly grease 2 loaf pans. Turn dough out onto a lightly floured surface. Divide into 4 equal portions. Gently form each into a ball. Place 2 balls side by side in each loaf pan. Cover with towel and allow to rise 1 hr again..
- After second proof preheat oven to 425°F. Do not punch down dough this time. If desired beat 1 egg OR melt butter and gently brush over the top of each loaf. Gently place pans in oven (careful not to bump pans or drop onto rack). Bake 20-30 minutes or until tops are browned..
- Remove from oven. Let loaves cool 5 minutes in pans. Transfer to a wire rack to cool completely..
- To serve: Slice to desired thickness (1/2 thick is nice). Spread butter, jam/jelly, peanut butter, drizzle honey, etc. The toppings are endless for hearty homemade bread!.
- See notes below ⤵.
- Note 1: You can make this bread without a stand mixer. Mix all ingredients in same way as written above in a large bowl with a wooden spoon. Turn out onto a floured surface and knead by hand for 8 minutes. Continue with remaining steps from there..
- Note 2: It is definitely important to scald the milk as it will contribute to a lighter bread texture. "Scalding" milk means to bring it nearly to a boil, then to allow it to cool back down..
- Note 3: When forming balls, you are not actually rolling the dough into balls. Just pick up a section and gently manuever to shape a ball or your bread may end up too dense..
- Note 4: Be EXTREMELY careful if brushing with egg or butter. Even the slightest excess pressure will cause a loaf to fall and not remain risen while baking. Sadly, this happened with one of my loaves today. No worries, if this happens the bread is still edible, it's just not as pretty. Lol.
Knowing what and how to cook to impress your in-laws isn’t always easy. The good news is that, as family or future family, they will (hopefully!) be prepared to like you anyway, and they will recognize that you are making an effort and be appreciative of that fact in itself. None the less, it is nice to be able to whip up food that impresses, without too much stress or work.
These days, most married couples start out both having careers. Gone are the days when the young wife has all day to prepare a fancy meal for a special family dinner. So it is particularly important to be cooking something that doesn’t take too long in total cooking time, and also that doesn’t require too many last-minute steps.
One technique that you can employ is to upscale a dish that you can already cook quickly and easily and that turns out well. For example, if you make great spaghetti, meatballs, and pasta sauce, you could aim for a more sophisticated version of the same dish, such as spaghetti, chorizo and pasta sauce topped with sprinkled feta cheese and fresh parsley. There are many variations possible on that one dish, so think how many more you can make on all the other things you already cook!
Another idea is to make something that is considered a fancy dish but in reality is quite foolproof, such as oven-roasted pork tenderloin (although be aware this takes a long time to cook).
Another cooking approach is the make-ahead tactic. If you make a great lasagna or chicken pot pie, these are all things that can be assembled or mostly assembled the night before, leaving you with less stress and more time on the day itself. The make-ahead tactic is also one of the best ways of getting multiple side items on the table in a timely manner.
It is important to take into account the cook time compared with the hands-on time of the dish. For example, roast beef doesn’t take much hands-on time but does take a lot of cooking time, whereas a pasta and chicken dish is the exact opposite. Depending on the other things that are going on that day, you may have a preference for one situation over the other. In designing a menu, remember also to check whether your in-laws have any food allergies or foods they will just not eat.
At all costs avoid meals where most of the cooking is to be at the last minute, such as stir-frying. Anything of that nature will mean that you may become flustered when combining a lot of cooking details with trying to make conversation with your in-laws.
Ultimately, remember that your in-laws are there to spend time with you and your spouse – not to get a five-star meal (there are restaurants for that!) Look at it from the point of view that a few days afterward, people want to remember that they had a good time being together, which actually has a lot more to do with the conversation than the food. In other words, don’t agonize over making the perfect side dish if it means you don’t get to spend as much time with your guests. Making an effort and spending time together, not cooking to perfection, is what counts in cooking to impress your in-laws.
Source : Cookpad